November 20, 2024 | Posted in Made by Hand | No Comments.
I was gifted an awesome A1 size pen plotter and needed a spot to easily create some artwork. Might as well also store some supplies and have a place to sit at right? I came up with this design that is rather specific to its ultimate resting place; sandwiched between my wife’s desk and mine.
I cut some mortise and tenons for the legs with the help of a table saw and router.
Used just about all of the clamps I had and a soft hammer to help square it up.
Adding the front facing dividers that will help support the boxes / drawers.
For the drawers, I went with a joint that hid the outside connection, as described in this video by James Hamilton. I was trying to use the wood I already had, which resulted in the drawers being made of wood with different thicknesses. So I had to adjust the saw more frequently. Wish I took more work in progress pictures of the boxes 🙁
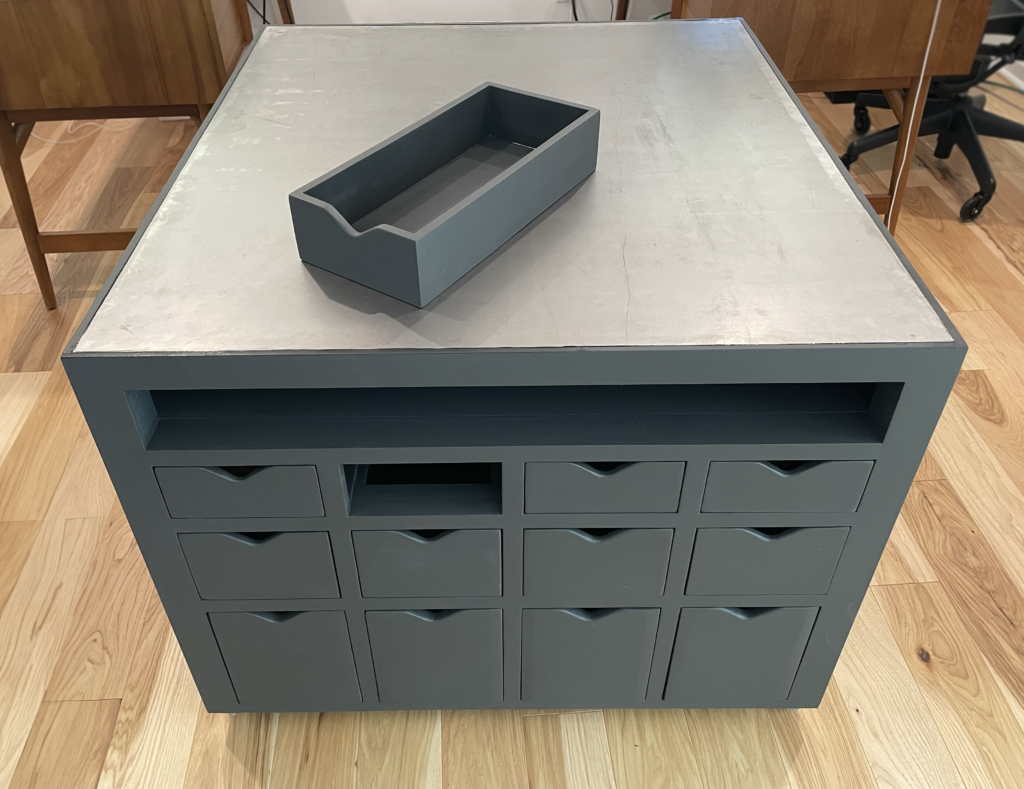
Added all of the rails for boxes to slide on. The wide opening at the top is for paper to slide into.
The rails are solid pieces of wood for strength. I did some rabbets and dados and grooves and what nots.
All of the drawers pull out for transporting of supplies, pens, brushes, paints, etc.
Final resting place between our two desks. It has wheels so we can roll it out if needed. The metal top is great for using magnets to hold the paper.
April 9, 2024 | Posted in Made by Hand | No Comments.
My daughters needed stools to brush their teeth. We had trouble finding one that was wide enough for the both of them. My generous neighbor gave me a thick piece of mahogany(?) and I thought it would be perfect for the piece.
The piece was too thick to cut through completely with the table saw. I finished the cut by hand with a pull saw.
Took a while to halve the slab. I couldn’t seem to get all of the dominos out of the board.
I joined the two pieces with some wood glue and a half lap joint to make one longer board for the top.
I cut some of the dovetails on the band saw. And the angled ones by hand.
I made some dados(?) to hold some runners under the top plank.
Glue up after the top dove tails are complete.
Wood pegs were used to help with strength to join the smaller step.
March 3, 2024 | Posted in Made by Hand | No Comments.
A generous neighbor who’s a carpenter gave me some smaller pieces of ipe wood. It was very dense and more difficult to work with than what I am used to. It is very durable and weather resistant; between that and the size of the board, I immediately thought of a penny board.
Trying to make a slight concave on the deck to help with grip. I tried running the board perpendicular along the blade using the white board as a guide. I raised the blade up slowly per pass. It wasn’t as effective as I had hoped on a board of this size.
The belt sander helped smooth things out a bit.
I printed out a guide for cutting and used the band saw to get it close to the edge.
I clamped the belt sander down to use it to get close to the edge.
I drew a pattern on the top with a marker and then dug into it with the Dremel tool.
I bought some Paris trucks for itty bitty boards and some cruising Super Juice wheels. It’s just under 6 inches wide; my toes and heels hang off the edge.
January 19, 2024 | Posted in Made by Hand | No Comments.
Finished wooden espresso cups, walnut and light wood.
I used a plexiglass circle template with a router bit and bearing to make the initial circle. But the depth was too shallow and I didn’t want to use an extension. I purchased some little sphere rotary burrs, rough and smooth for the drill and finished the rest by hand. I cut the exterior wood with a band saw and did a ton of sanding. I finished them with the natural finish Tried and True.
October 29, 2023 | Posted in Made by Hand | No Comments.
The finished pedicab.
The original Miami Sun tricycle I purchased on Craigslist. No idea how old it was, but it was definitely not new. That big saddle seat was the most comfortable bike seat I ever experienced.
The frame was bolted together just before the axle so it could be disassembled.
I extended the frame from behind the back seat to the back axle using some angle iron. Initially I tried to use bolts. But due to the extension and the original angle, the pedals were too low and would hit the ground. So I had to angle it up a bit and weld it together.
I found some metal on the side of the road in a trash pile that appeared to be a part of a porch swing. It seemed to make a nice shape and might function well to offer stability and serve as a platform / deck.
I supported those curved pieces with some ribs connected to the other parts of the frame.
I found this on the side of a road, someone was giving it away. I liked the lines of the arm rests and it was in ok shape.
I started on the platform for the seating. The tubes are from the metal lounge chair and the square tube I purchased from a big box store.
Building out the back of the seat and foot steps using a mixture of metal from the found porch swing, lounge chair and purchased pieces.
Added the arm rests from the lounge chair and welded on some nuts to receive the bolts that will hold on the wood pieces.
Close up of the nuts welded to the frame. The curved piece was not flat on top, was hollow and with thin walls so I did not want to drill holes through it. This was extremely tedious and unpleasant : /
The wood is from a dilapidated play set we had to take down because it was rotten. I saved some of the wood, milled it down and used it for all the wood pieces for the project.
I disassembled the rear axle, pedal mechanism, front axle and front fork. I cleaned, greased and then rebuild them which helped a lot with speed.
Using a grinder, hand sander, steel wool and wire brush; I tried to remove debris and rust to prepare for painting.
Primed the pieces with a Rust-Oleum rust reformer spray paint.
I really liked the look of the matte black of the primer. I was a bit surprised at how well it came out. I thought about leaving it, but my daughter really wanted green; and I like loud colors. So green it is.
We went with Spring Green Rust – Oleum 2x Ultra cover and it is not subtle; people will see it coming for sure 😉
I bought some yellow and pink from Spray.bike, but I went through it very quickly. So we could only do the fenders and the back rims. My dad helped me with the painting ( thanks dad! )
I joined two bike chains together, but the frame was now welded together, so I could not tighten it properly by sliding the frame. Probably why the frame was bolted together in the first place. I bought a half link which got it closer, but it was still too loose. I found a chain tensioner on Amazon and it does the job.
I painted the kids’ helmets to match the frame. The seats are foldable boat seats I purchased from the internet. Added wood arm rests with cup holders. The left is a kid safety harness for the little one and the right is a golf cart seat belt.
Peacocks are created using a custom peacock generator application written in OpenFrameworks. Each peacock is programmatically generated, and therefore unique. Peacocks are printed on a pen plotter and then water colored by hand. Each peacock is a triptych, composed of three 11 x 17″ pieces to compose the complete work. Below is the programmatic generation of my friend “Franklin.” More pen plotter works can be seen in Drawing Machine.
The output from the custom software is sent as lines to the pen plotter in three separate pieces.
After the pieces have been printed on the plotter, they are water colored by hand.
Squids are created using a custom squid generator application I wrote in OpenFrameworks. Each squid is randomly generated, and therefore unique. Squids are printed on a pen plotter and then water colored by hand. Below is the process for creating “Damarion.” More pen plotter pieces are viewable in Drawing Machine.
The output printed on the pen plotter and then water colored by hand, yielding the finished result below: